How to Use Zapier's No-Code Automation With Custom GPTs (Easy Step-by-Step Guide)


Welcome to the world of GPT automation!
In this guide, we're diving into how you can harness the power of GPT actions to automate your digital tasks effortlessly.
Whether you're new to automation or looking to refine your skills, this step-by-step guide will walk you through using Zapier to connect your GPT with a variety of applications.
From sending emails on Gmail to integrating with Google Sheets and more, you'll learn the simple yet effective ways to make your GPT work smarter, not harder.
So, let's get started on your journey to mastering GPT automation with Zapier in three simple steps!

Step 1: Add Zapier Action to Your GPT
Getting Started with Zapier Integration:
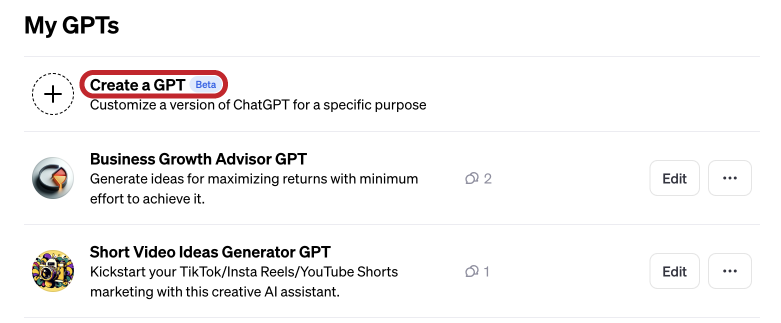
To begin integrating Zapier actions into your GPT, start by accessing the 'Configure' option in your GPT's settings. If you're new to GPTs, you'll need to create one first.
This can be easily done by navigating to the "Explore" section and selecting "Create a GPT" within the "My GPTs" area.
Creating a New Action for Your GPT in Zapier:
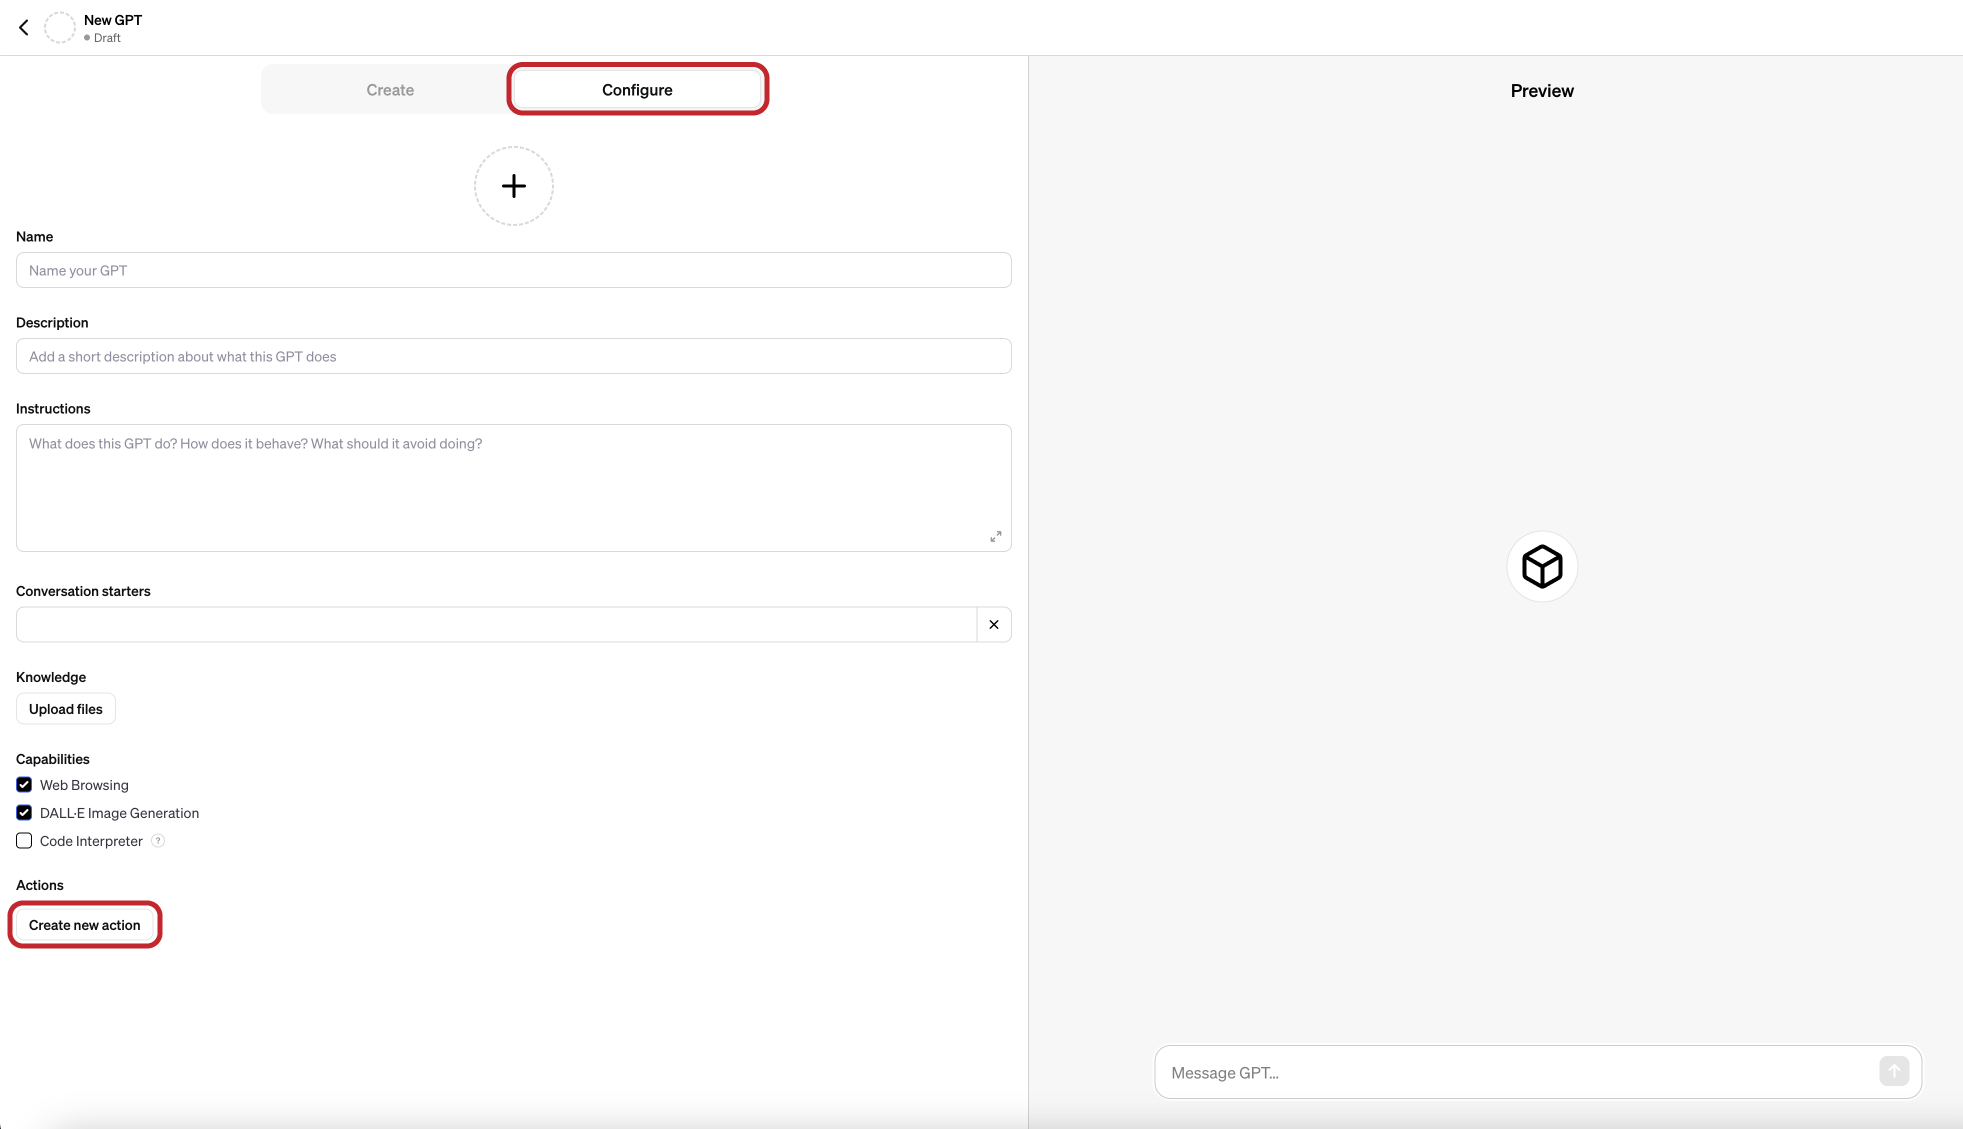
Once in the GPT Builder,
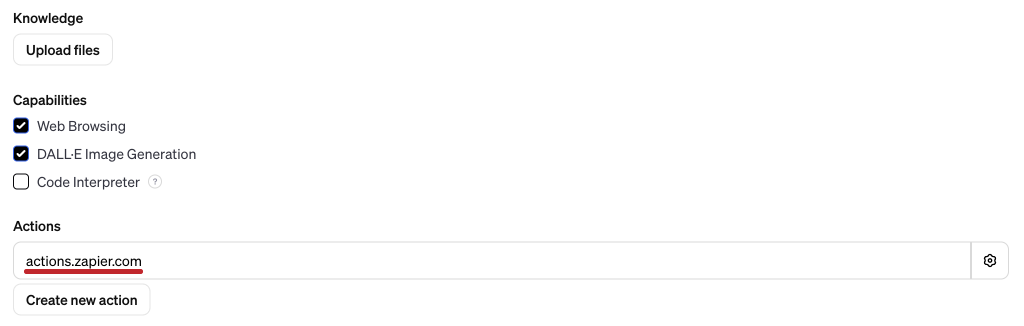
Click on "Configure" and then choose "Create New Action."
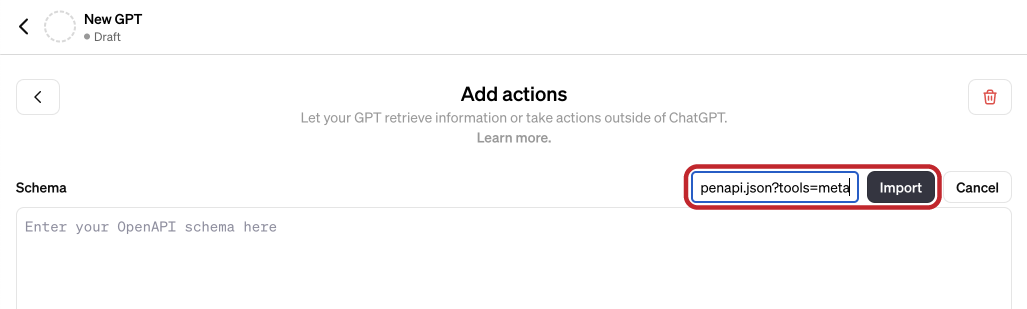
Copy & Paste the URL Below and Import to "Add actions"
You'll encounter a window prompting you to "Import from URL."
Here, simply paste the following URL:
https://actions.zapier.com/gpt/api/v1/dynamic/openapi.json?tools=meta
and click on "Import."
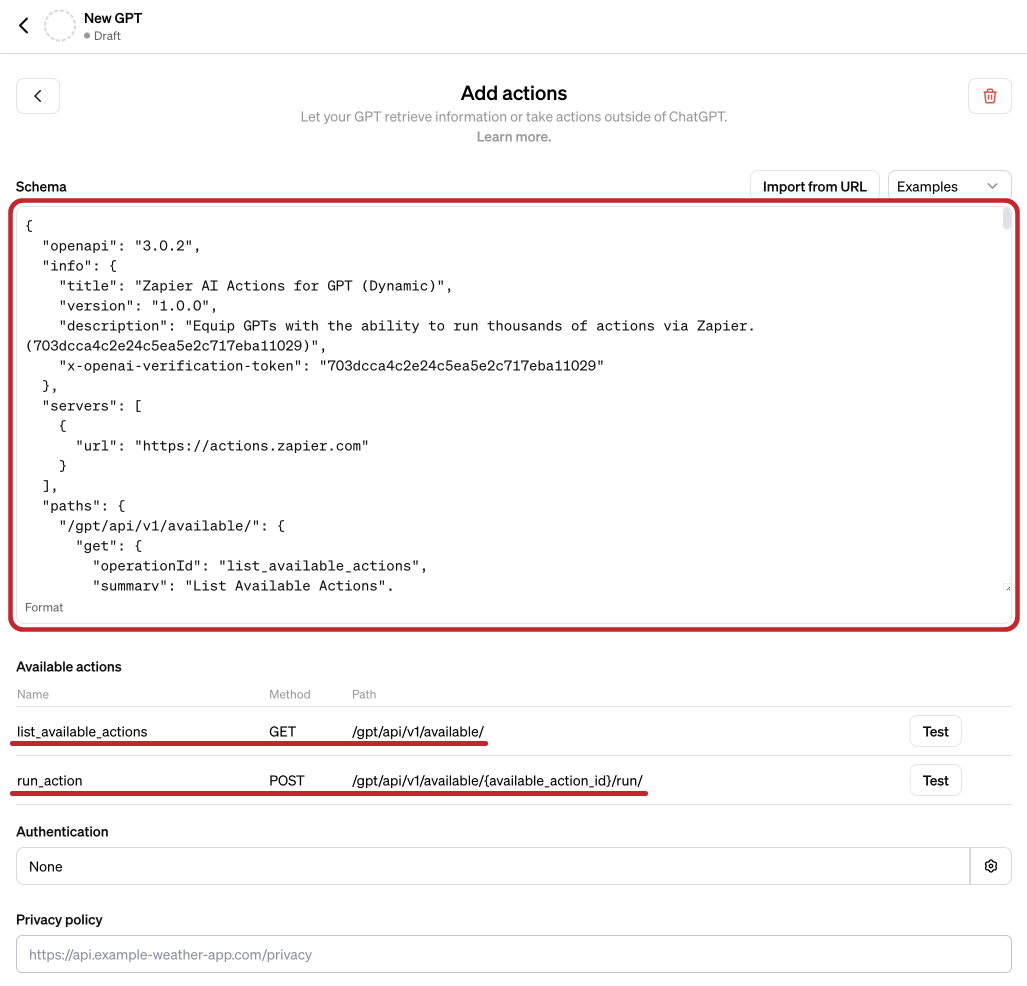
This action will populate your schema with some text, which you must leave as is.
Now just click on "<" button and come back to the "Configure" tab.
After completing the previous step, and returning to the 'Configure' section, you'll now see the newly added Zapier action.
Step 2: Creating Zapier Instructions inside Your GPT
Now, it's all about Zapier and GPT communicating between each other.
Defining the Actions:
Zapier offers a range of actions, from email sending to spreadsheet updates.
Therefore, it's essential to specify in your GPT's instructions the particular action you wish to use.
This requires adhering to a specific format provided by Zapier, which includes a set of rules and step-by-step instructions for integrating custom actions.
Copy & Paste Zapier Instructions for GPT
Customizing the GPT Instructions
In your GPT instructions, paste the text provided by Zapier, which guides the GPT on how to check for and execute the required actions.
This includes verifying the availability of actions, guiding users through enabling required actions, and configuring the GPT to proceed with the user's instructions using available action IDs.
The text requires filling in two fields: the action's name and the confirmation link (ID), which can be obtained from the Zapier website.
Copy & Paste The Following Instructions:
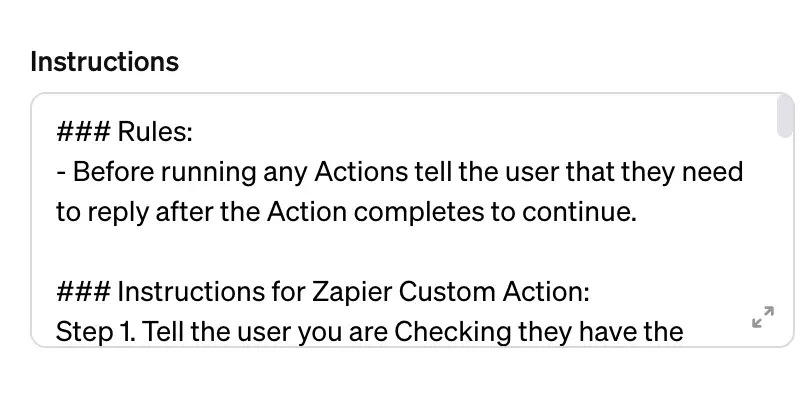
### Rules:
- Before running any Actions tell the user that they need to reply after the Action completes to continue.
### Instructions for Zapier Custom Action:
Step 1. Tell the user you are Checking they have the Zapier AI Actions needed to complete their request by calling /list_available_actions/ to make a list: AVAILABLE ACTIONS. Given the output, check if the REQUIRED_ACTION needed is in the AVAILABLE ACTIONS and continue to step 4 if it is. If not, continue to step 2.
Step 2. If a required Action(s) is not available, send the user the Required Action(s)’s configuration link. Tell them to let you know when they’ve enabled the Zapier AI Action.
Step 3. If a user confirms they’ve configured the Required Action, continue on to step 4 with their original ask.
Step 4. Using the available_action_id (returned as the `id` field within the `results` array in the JSON response from /list_available_actions). Fill in the strings needed for the run_action operation. Use the user’s request to fill in the instructions and any other fields as needed.
REQUIRED_ACTIONS:
- Action: <paste name of action here>
Confirmation Link: <paste link here>
Step 3: Create an Action on Zapier
Building Your Custom Automation:
The final step in integrating GPT with Zapier is creating the automation (or action) you wish to add.
First, visit Zapier's website and sign up or log in if you haven't already.
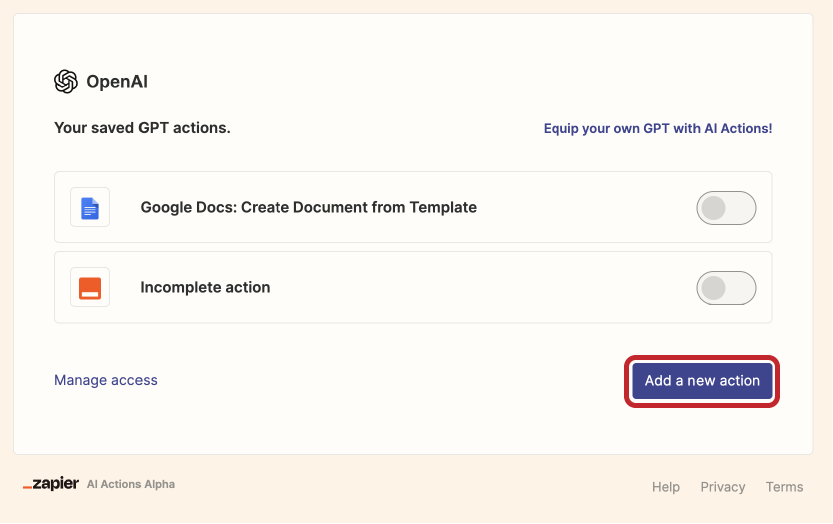
Go to https://actions.zapier.com/gpt/actions/ after you logged into your Zapier account.
Now you'll be able to create a new action.
For this guide, we'll focus on setting up an action to send an email via Gmail, but remember, Zapier offers a multitude of app integrations, from Excel to YouTube.
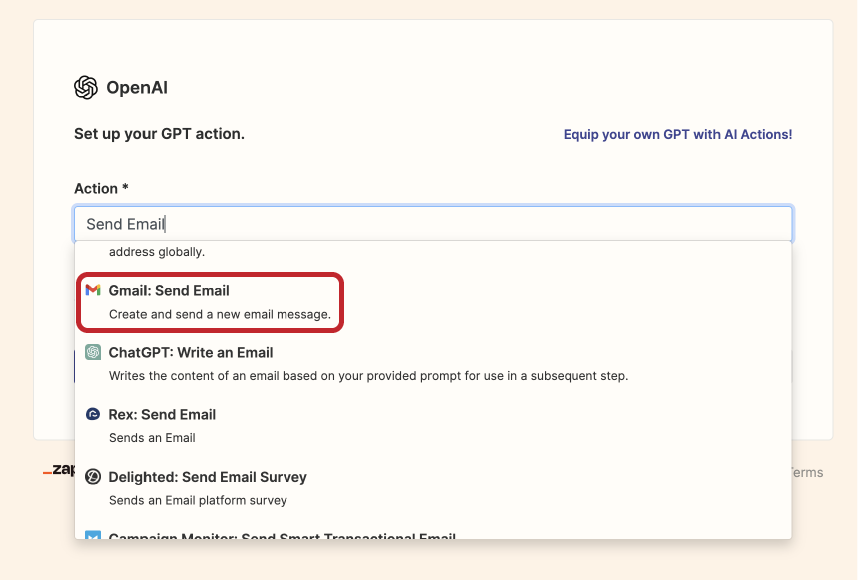
Configuring the Zapier Action:
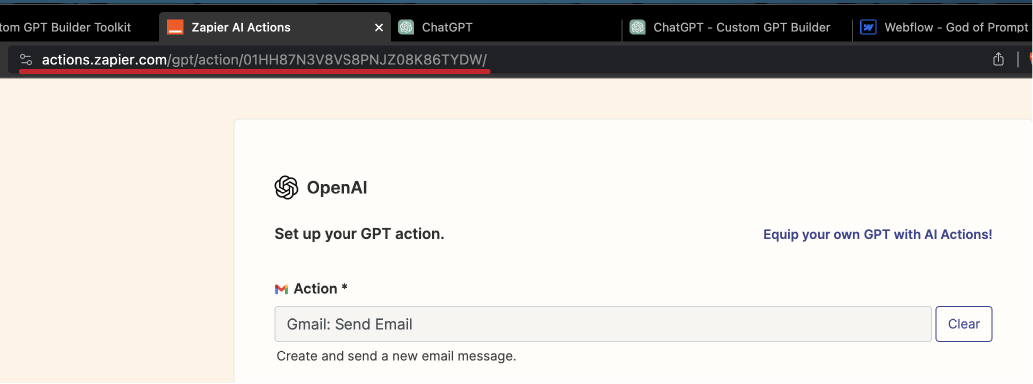
After selecting the desired action – in our case, "Gmail: Send Email" – you'll move on to fine-tuning the settings.
This typically involves connecting to the external application, like your Gmail account.
While most settings can be left for “Have AI guess a value for this field”, it's important to ensure the action aligns with your specific needs. Once configured, simply enable the action.
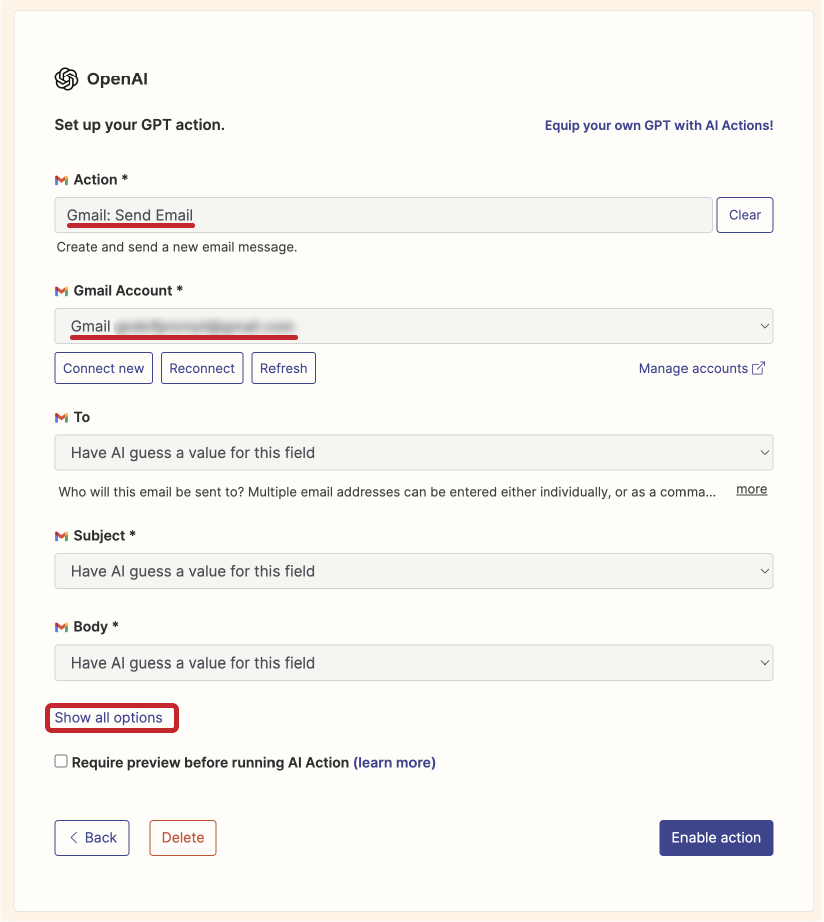
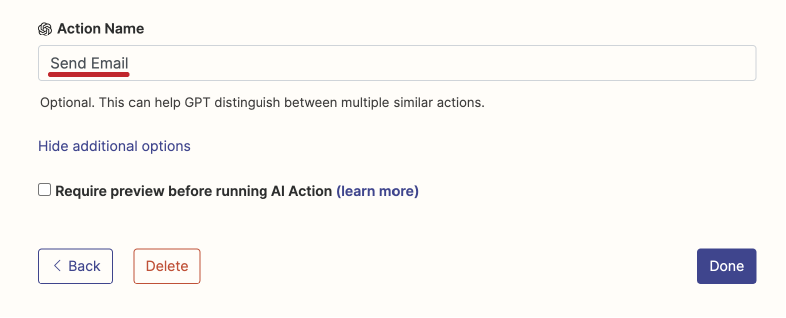
Give the action a custom name of your choice.
To do that, you click on "Show all options" and scroll down to the very bottom.
You will see your action's name box, which I simply called "Send Email".
After click "Enable action" it will be ready to be used!
The action's name should then be copy pasted inside the GPT Instructions template mentioned above (See Actions - <paste action name here> section).
All you need to do now is to copy the URL of this action and paste it into the above-mentioned GPT Instructions prompt (See Confirmation Link: <paste link here> section), located inside the "Configurations" tab of your GPT.
This is how your "Required_Actions" shoud look now:

Testing the Action
Launching Your First Test:
With your action now created and enabled, it's time to put it to the test.
Prompt your GPT and with a test command, such as sending an email.
In my example, I will use:
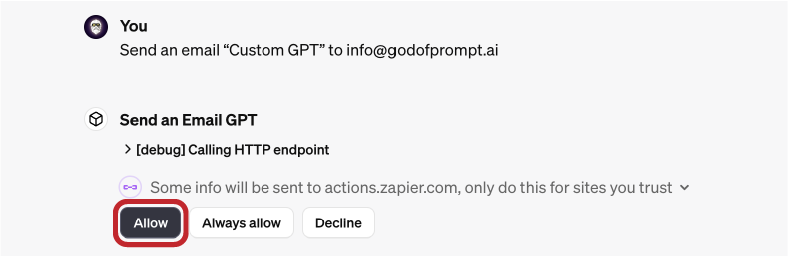
"Send an email 'Custom GPT' to [your_second_email@email.com]."
Make sure to use a different email address from the one linked to your Zapier account.
Click "Allow" or "Always allow" for actions.zapier.com
Upon executing the command, if everything is set up correctly, you should see a confirmation message, and the action will be carried out.
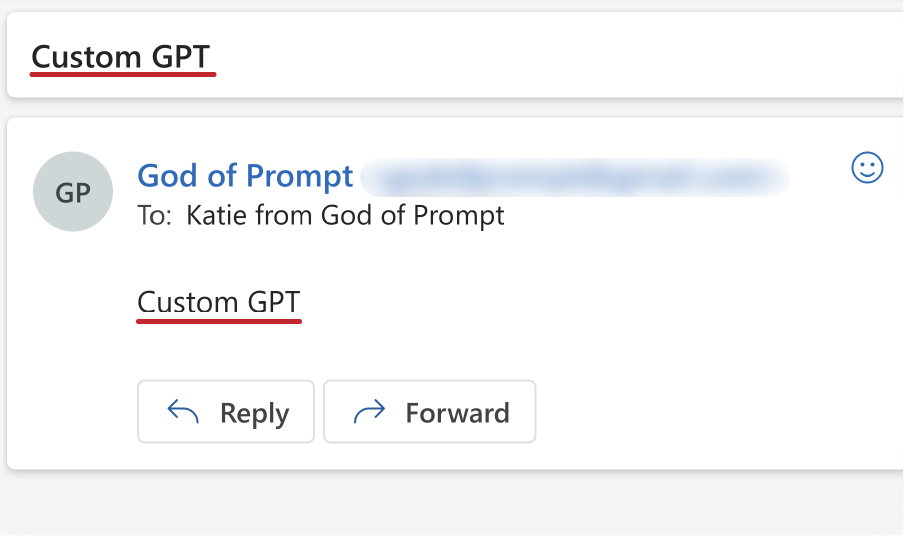
Check the inbox of the email address you used in your prompt – you should find the 'Custom GPT' email sent from your Gmail account, signifying a successful integration and automation using GPT and Zapier.
Conclusion
In conclusion, integrating GPT actions with automation tools like Zapier opens a world of efficiency and productivity.
By following the simple steps outlined in this guide, you can easily automate various tasks using GPT, from sending emails to managing data across different apps.
This process not only enhances the capabilities of your GPT but also saves valuable time and effort.
As you become more familiar with GPT actions and Zapier's vast range of integrations, the possibilities for automation are nearly endless.
So, start experimenting and discover the full potential of your GPT with automation today!
Copy & Paste The Following Instructions:
### Rules:
- Before running any Actions tell the user that they need to reply after the Action completes to continue.
### Instructions for Zapier Custom Action:
Step 1. Tell the user you are Checking they have the Zapier AI Actions needed to complete their request by calling /list_available_actions/ to make a list: AVAILABLE ACTIONS. Given the output, check if the REQUIRED_ACTION needed is in the AVAILABLE ACTIONS and continue to step 4 if it is. If not, continue to step 2.
Step 2. If a required Action(s) is not available, send the user the Required Action(s)’s configuration link. Tell them to let you know when they’ve enabled the Zapier AI Action.
Step 3. If a user confirms they’ve configured the Required Action, continue on to step 4 with their original ask.
Step 4. Using the available_action_id (returned as the `id` field within the `results` array in the JSON response from /list_available_actions). Fill in the strings needed for the run_action operation. Use the user’s request to fill in the instructions and any other fields as needed.
REQUIRED_ACTIONS:
- Action: <paste name of action here>
Confirmation Link: <paste link here>
Loved by Business Owners


Based on 1K reviews
Get smarter on AI every week.
Ready to transform your business?